10 Easy DIY Home Decor Ideas Anyone Can Try
“You can’t use up creativity. The more you use, the more you have.” — Maya Angelou’s words ring true when reimagining your space. Like many, I discovered how small creative projects can breathe new life into rooms without draining time or budgets.

Source: Diy Home Decor Easy
After experimenting with I Spy DIY’s live-edge shelf tutorial and Julie Rose’s painted headboard concept, I realized how everyday materials become design gold. A reclaimed wood slab transformed my blank
This guide shares my favorite methods to personalize spaces. You’ll learn how paint techniques elevate furniture and how strategic accents add character. Even beginners can master these projects—no fancy tools required. I’ve included step-by-step breakdowns and pro tips to ensure success.
Key Takeaways
- Repurpose existing items with paint or texture for instant upgrades
- Use natural materials like wood to create organic focal points
- Follow expert-led tutorials for professional-looking results
- Focus on walls to maximize visual impact in any room
- Combine functionality with style through multipurpose designs
Introduction to Creative DIY Home Decor
To me, creative projects turn blank walls and tired furniture into stories. They’re about seeing potential in what others might discard—like that chipped dresser I transformed with muted green paint last spring. This approach lets rooms evolve with your life, not a contractor’s schedule.
One game-changer? A fresh coat paint strategy. Light hues on ceilings create airiness, while bold accent walls add depth. I once used soft gray to make space feel twice its size in a cramped office nook. It’s magic with a roller brush.
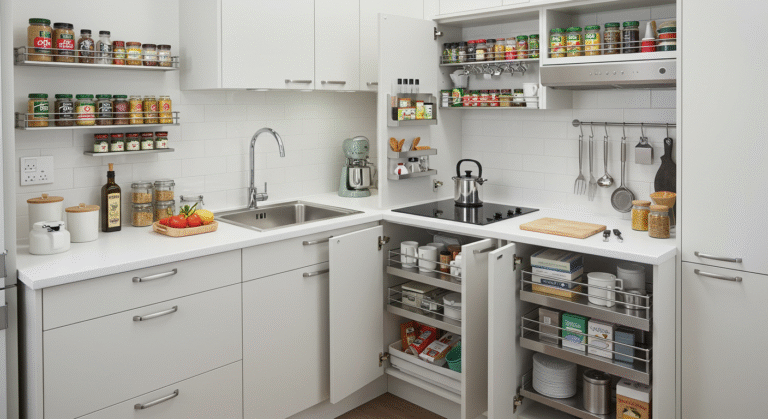
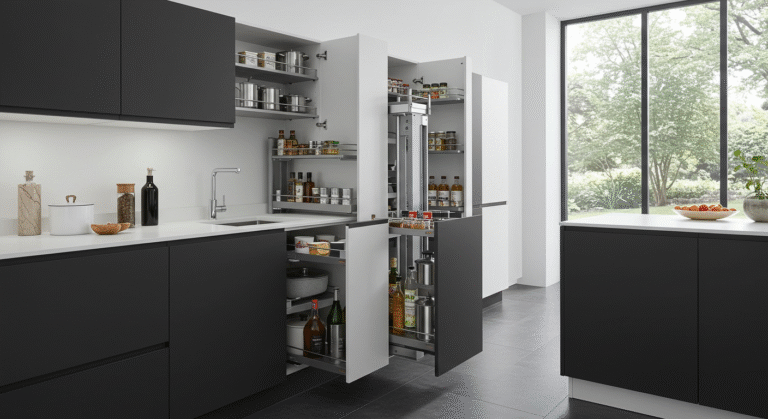
Why choose hands-on projects over renovations? They’re kinder to wallets and timelines. My kitchen’s dated cabinets got new life with beadboard panels and matte handles—no demolition required. Plus, mistakes become design quirks rather than costly disasters.
Balance matters most. I prioritize upgrades offering both visual punch and practical use. That floating shelf holding my plant collection? It stores books and draws the eye upward. Later sections will walk through similar dual-purpose solutions.
Small shifts create big impacts. Rearranging lamps or adding woven baskets can make space feel curated without a single nail. I’ll share my favorite fresh coat paint combos and layout tweaks that work like optical illusions.
Read Also: 10 Cozy Bedroom Ideas to Create the Perfect Retreat
Embracing DIY Home Decor Easy Projects
Acrylic paint became my secret weapon for revamping tired furniture. My journey began with small weekend upgrades—like refreshing cabinet handles with metallic finishes. These quick transformations showed how simple changes could redefine a room’s energy.

Bret Gum’s hand-painted floor techniques revealed how acrylic paint adapts to surfaces. I tested stenciled patterns on an old side table, blending durability with artistic flair. Cate Black’s decorative accents taught me to layer colors for depth without professional tools.
A fresh coat works wonders, but detailed methods unlock true potential. Solid walls gain character through geometric tape designs, while furniture revivals mix bold bases with delicate brushstrokes. My kitchen chairs evolved from scuffed to stylish using this combo.
These projects let me inject personality affordably. That thrifted mirror frame? Three shades of acrylic paint and an hour’s work made it a bathroom centerpiece. Upcoming sections will explore specific applications, from accent walls to mixed-media textures.
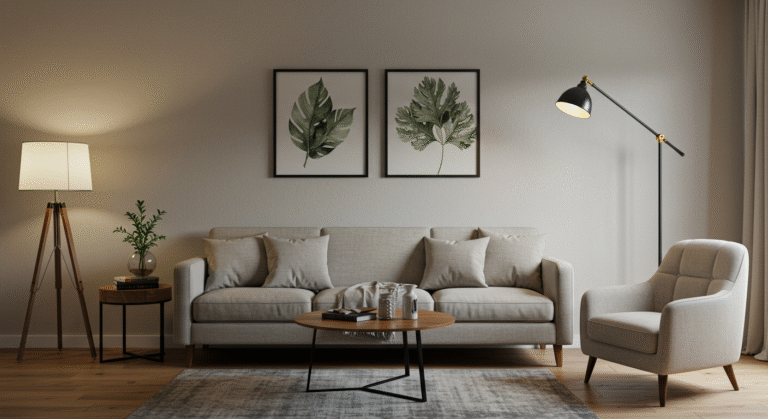
Transforming Your Walls with Accent Techniques
Walls hold untapped potential—blank canvases waiting for personality. My experiments with accent techniques taught me how strategic choices redefine rooms. Jenni Yolo’s live-edge shelf approach became my blueprint for merging utility with artistry, while Julie Rose’s bold headboard designs proved color’s transformative power.

Floating Shelves as Functional Art
Yolo’s method uses raw wood edges to create organic focal points. I followed her lead, mounting a walnut slab with iron brackets above my desk. Staining the wood deepened its natural grooves, turning it into a display for plants and ceramics. These shelves serve dual purposes: storage and a rotating gallery of finds.
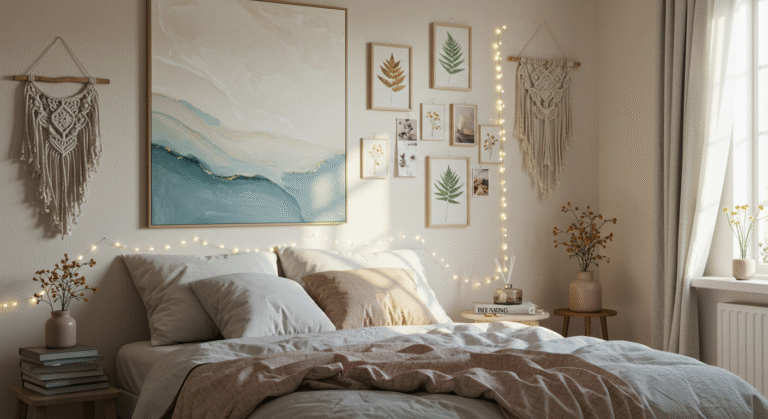
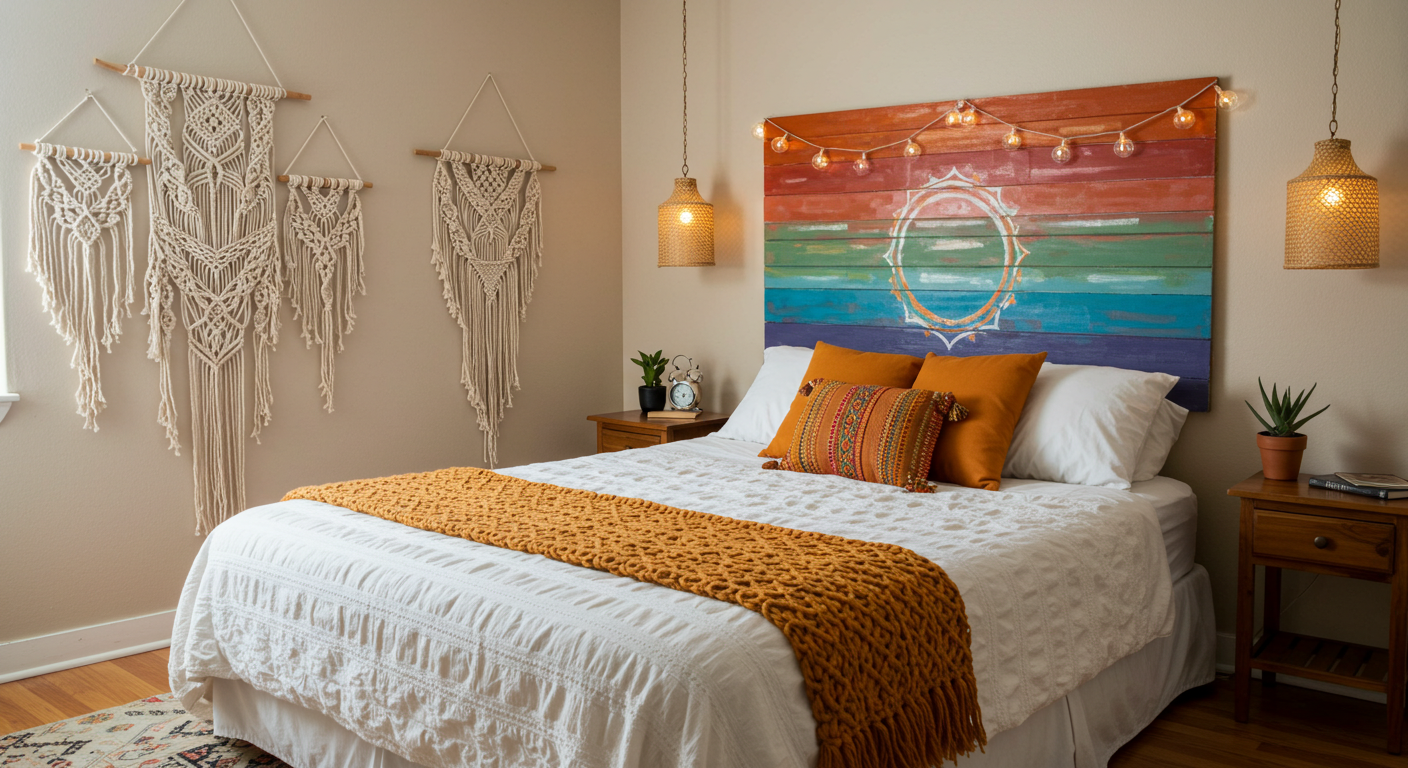
Painted Headboards for Impactful Style
Rose’s geometric headboard concept changed how I view bedroom walls. Using painter’s tape, I mapped a triangle pattern behind my bedframe. Two coats of navy acrylic made the shapes pop, creating depth that tricks the eye. This approach visually stretches the space without physical renovations.
Both projects taught me that walls anchor a room’s energy. Whether through textured wood or crisp lines, these accents balance practicality with creative flair. Start small—even a single shelf or painted detail can shift a room’s entire narrative.
Innovative DIY Furniture and Storage Solutions
Clutter used to overwhelm my rooms until I discovered storage that doubles as style. Ananda Yankellow’s cubby cabinet blueprint showed me how to blend practicality with artistic flair. By combining open compartments with textured finishes, these units organize while adding warmth to any layout.

Cubby Cabinets Meet Natural Elements
Yankellow’s design uses wooden planks to build modular units that adapt to any wall. I customized mine with varying shelf heights to store books, plants, and ceramics. Sanding the edges created a rustic charm that makes the piece feel intentional rather than purely functional.
Reimagined Ladder Displays
An old wooden ladder became my favorite accessory rack after stripping its paint and adding brass hooks. Leaning it against the wall creates vertical storage for scarves and bags while enhancing the space feel through layered textures. This approach merges vintage character with modern interior design principles.
Read Also: 17+ Living Room Makeovers That Look Expensive
| Project | Materials | Function | Style Impact |
| Cubby Cabinet | Wooden planks, sandpaper | Multi-level storage | Adds organic texture |
| Ladder Rack | Reclaimed ladder, hooks | Vertical organization | Industrial-meets-rustic |
| Live Edge Shelf | Raw wood slab, brackets | Display surface | Natural focal point |
These solutions transformed how I approach interior design. The cubbies corral clutter while showcasing favorite items, and the ladder rack turns daily essentials into curated displays. Both projects improve the space feel by merging utility with visual storytelling.
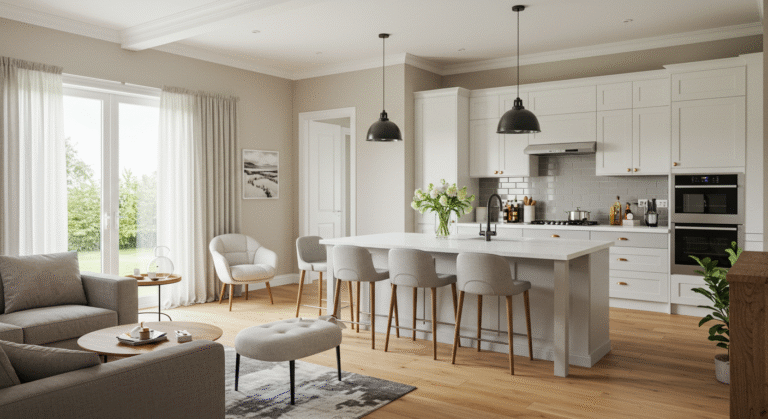
Refreshing Rooms with a Fresh Coat of Paint
Paint wields transformative magic—it’s cheaper than therapy and faster than moving. Cate Black’s striped bathroom wall project taught me how calculated strokes create optical depth. Her vertical lines tricked the eye upward, turning cramped quarters into chic retreats.

Coordinating Color Schemes and Bold Patterns
I start every refresh by testing three harmonizing hues. A coat paint strategy using analogous tones (like sage, seafoam, and slate) adds sophistication without chaos. In my sunroom, this approach made the space feel layered yet cohesive.
Sponge paint techniques became my go-to for adding tactile interest. Dab a damp sponge over base layers to create organic texture ideal for hiding imperfections. I used this method on a dated fireplace surround, blending terracotta and cream for sunbaked warmth.
Bold patterns work like visual caffeine. Stripes widen narrow hallways, while geometric shapes energize bland walls. My favorite hack? Painting ceiling medallions in contrasting shades to draw attention upward. This trick makes space feel airier without structural changes.
One coat paint revival stands out: a guest bedroom’s feature wall with overlapping diamond shapes. The interplay of matte and metallic finishes turned it into a conversation starter. Another win? Using sponge-painted terrazzo effects on kitchen cabinets proof that creativity trumps cost.
Exploring DIY Woodwork and Reclaimed Materials
Reclaimed wood carries stories in its grain, turning ordinary projects into conversation starters. My barn door-turned-floating shelf showcases this perfectly its weathered knots and nail holes add character no new lumber could replicate. Using salvaged materials reduces waste while creating one of a kind focal points.

Floating shelves became my go-to solution for tight areas. Mounting a live-edge maple slab above my entryway transformed unused vertical space into a display zone for keys and art. These installations balance practicality with visual intrigue, especially when paired with sleek metal brackets.
Mixing aged materials with contemporary lines creates a compelling look. I paired rough-sawn oak planks with minimalist black hardware in my kitchen the contrast highlights the wood’s texture while keeping the space feeling modern. This approach works wonders for bridging design eras.
Read Also: Mobile Home Landscaping: Transform Your Outdoor Space
| Material Source | Preparation Tips | Best Use Cases |
| Barn Wood | Sand lightly, preserve patina | Accent walls, tabletops |
| Shipping Pallets | Check for stamps (HT=heat treated) | Floating shelves, planters |
| Flooring Remnants | Remove old finish, reseal | Picture frames, coasters |
When sourcing materials, prioritize structural integrity over perfection. My favorite finds often come from demolition sites just inspect for rot and insects. A vinegar-water scrub followed by linseed oil typically restores their natural beauty.
These projects taught me to see potential in overlooked corners. That narrow wall by the staircase? Now home to staggered reclaimed shelves holding books and trailing plants. Every inch serves purpose and personality.
Unique Ideas to Make Space Feel Bigger
I discovered how visual tricks can reshape rooms during a studio apartment phase. My 400-square-foot space taught me that smart design choices matter more than square footage. Two strategies became game-changers: manipulating walls and harnessing light reflection.

Optical Illusions with Accent Walls
Vertical stripes transformed my narrow hallway. Using painter’s tape and alternating matte/gloss finishes created depth that pulls the eye forward. For bedrooms, I’ve tested color gradients darker bases fading upward to visually lift ceilings.
Frame-filled accent walls work like magic. I arranged mismatched mirrors and thin molding into geometric patterns behind my sofa. The reflective surfaces bounce light while creating a display that feels expansive. This approach adds dimension without physical changes.
Utilizing Mirrors and Lighting Effects
Strategic mirror placement doubles perceived space. Hanging a large oval mirror opposite my window amplified natural light and extended sightlines. Smaller grouped mirrors near lamps create focal points that expand the room’s edges in peripheral vision.
Layered lighting eliminates shadowy corners. I combined recessed ceiling lights with adjustable sconces and floor lamps. This trio allows me to control brightness zones, making the space feel adaptable rather than confined.
| Element | Placement Tip | Visual Impact |
| Floor Mirror | Angle toward seating area | Reflects activity zones |
| Strip Lighting | Under floating shelves | Highlights depth |
| Metallic Accents | Near light sources | Boosts reflection |
These techniques prove that perception shapes reality in design. My galley kitchen gained breathing room through horizontal subway tiles and under-cabinet LEDs. Even closets benefit from mirrored doors and puck lights every inch becomes part of the visual story.
Budget-Friendly DIY Home Decor Crafts
Budget constraints sparked my creativity more than unlimited funds ever could. Mike Garten’s floral candlestick hack became my gateway to affordable style turning dollar-store finds into chic accents with spray paint and faux greenery. This approach taught me that wood, thrifted items, and plants can transform any room without draining savings.

My favorite project? Repurposing wooden crates into wall-mounted shelves. Sanding rough edges and staining them walnut created rustic displays for books and trailing pothos. Total cost: $15 versus $200 for store-bought units. Garten’s methods prove that thoughtful details matter more than price tags.
Natural elements elevate budget crafts effortlessly. I line terracotta pots with moss and cluster them on reclaimed shelves instant indoor garden vibes. For tablescapes, painted branches in glass vases add organic texture. These touches make spaces feel alive without expensive plants.
| Material | Cost | Transformation Idea |
| Wooden crates | $5 each | Stacked nightstands |
| Mason jars | $2 | Hanging herb planters |
| Thrifted frames | $8 | Painted accent gallery |
Upcycling requires seeing potential. An old ladder became a vertical succulent display after adding planter boxes to each rung. Scrap wood slices transformed into coasters with resin sealing. Every project starts with two questions: “What do I already own?” and “How can this serve anew?”
Read Also: Elevate Your Living Space with a Stylish Drawing Room
Stylish frugality isn’t about sacrifice it’s strategic reinvention. Mixing thrifted ceramics with hand-painted wood trays creates curated tabletops. Grouping dollar-store candles on a reclaimed slab makes them look designer. The room gains character through layers, not labels.
Personalizing Your Interior with DIY Accents
Floors often get overlooked as design opportunities until you wield a brush. Inspired by Bret Gum’s bold patterns, I transformed my plain oak floors into a checkerboard masterpiece. This project taught me how surfaces become storytelling platforms when infused with personality.

Hand-Painted Floors for a Custom Look
My living room’s geometric design started with painter’s tape and two contrasting stains. The process felt intimidating, but Gum’s tutorials broke it into manageable steps. Now, guests pause at the threshold, drawn by the interplay of light and dark squares.
Fabrics became my secret weapon for cohesion. A textured rug in matching tones anchors the space, while linen curtains soften angular patterns. These layers prove that textiles can unify disparate elements without overpowering.
One bespoke shelf changed my entire entryway. Using reclaimed barn wood, I built a floating unit that displays pottery and holds keys. Its irregular edges contrast sleek metal brackets proof that singular statements spark conversations.
Balancing trends with personal taste requires strategy. I mix modern minimalism with vintage finds, like pairing a hairpin-leg table with hand-me-down quilts. This approach lets spaces evolve while maintaining authenticity.
Start small: a painted stair riser or stenciled closet floor. These micro-projects build confidence. As Gum says, “Your space should whisper your story before you speak.” Every brushstroke adds volume to that narrative.
Creative Projects Using Acrylic and Sponge Paint
What if your kitchen could tell a story through color? My exploration began with a sponge and a set of acrylic paints, transforming plain surfaces into dynamic art. I tested techniques from abstract wall textures to geometric cabinet patterns, discovering how these materials redefine spaces in unexpected ways.

A kitchen backsplash became my first canvas. Using painter’s tape, I sectioned off diamond shapes and dabbed metallic gold acrylic through a damp sponge. The result? Subtle shimmer that catches light differently throughout the day. This approach proves even functional areas deserve artistic attention.
Choosing hues strategically alters a room’s energy. Cool blues in my breakfast nook create calm morning vibes, while terracotta accents near the stove add warmth. I learned to test swatches at different times colors shift dramatically under natural versus artificial light.
These projects blend creativity with practicality. A dated pantry door gained new life through layered sponge strokes in coordinating greens. The textured finish hides fingerprints while adding depth. It’s a perfect way to refresh high-traffic zones without full replacements.
For balanced results, pair bold bases with delicate details. Try navy cabinets with feathery white sponge accents, or matte black walls with metallic silver stripes. Contrast keeps eyes moving while maintaining harmony. My favorite way to bridge styles? A neutral backdrop with pops of jewel tones through stenciled patterns.
Read Also: 10+ Elevate Your College Dorm Aesthetic: Tips & Inspiration
Step-by-Step DIY Projects for Beginners
My hands shook holding the drill for the first time until a thrifted picture frame taught me simplicity beats perfection. Starting small builds confidence. I’ll share how basic items like wooden clothespins and glass jars became my gateway to crafting.
Simple Tutorials to Get Started
Begin with projects requiring minimal tools. A hanging photo collage needs only:
| Essential Items | Purpose | Cost |
| Wooden clothespins | Photo holders | $3 |
| Twine | Hanging base | $2 |
| Spray paint | Color cohesion | $5 |
Arrange clothespins on twine using alternating angles. Clip personal photos or postcards for instant wall art. This top beginner project took me 45 minutes and transformed a blank hallway.
My first glass accent involved repurposing mason jars. I painted geometric patterns using acrylics and a sponge wedge. Display them with fairy lights or fresh herbs they add charm to any shelf.
Mistakes became design features, like uneven lines creating rustic appeal.
Choose projects offering quick visual rewards. Painted switch plates or stenciled storage boxes deliver style upgrades in under an hour. Focus on items you interact with daily these small wins fuel bigger ambitions.
Patience trumps precision. My initial shelf installation leaned slightly left, but that imperfection now sparks conversations. As one designer friend advised: “Done beats perfect every time.”
Maximizing Style with DIY Floating Shelves and Wall Displays
Vertical surfaces became my secret weapon for solving storage dilemmas. Jenni Yolo’s live-edge shelf method taught me to treat walls as functional canvases. By mounting walnut slabs with iron brackets, I turned unused floor space into curated displays for ceramics and trailing ivy.
Live Edge Shelf Techniques and Organizational Hacks
Yolo’s approach emphasizes raw wood textures. I followed her tutorial to create staggered shelves along my stairwell, using sanded cedar planks with visible knots. Staining them espresso let the natural grooves shine while matching my existing floor plans.
Good Housekeeping’s stacking strategy revolutionized how I organize:
- Use acrylic risers to double shelf capacity
- Group items by color for designer-approved cohesion
- Rotate seasonal decor to maintain visual freshness
My entryway gained function through floor-to-ceiling shelves with woven baskets. They corral shoes and scarves while adding earthy texture. For tighter areas, I installed floating ledges above door frames perfect for displaying air plants and mini art prints.
Designer touches emerge through intentional contrasts. Glossy black brackets against weathered wood create modern-rustic balance. I’ve since adapted these ideas for bathroom storage, using sealed teak shelves to hold towels and succulents.
These solutions prove that walls can work harder than floors. Start with a single shelf near eye level, then build outward. As Yolo advises: “Let your space grow with your needs one thoughtful layer at a time.”
Incorporating Plants and Natural Elements into Your Decor
The quiet power of greenery transformed my space before I added a single furniture piece. A spider plant in a thrifted vase became my gateway to blending nature with design. Its trailing leaves softened harsh lines while purifying the air proof that living elements elevate rooms beyond aesthetics.
Terracotta pots became my favorite canvas for creative upgrades. I revived plain planters with textured coat finishes using sponge paint techniques. A mix of matte black and metallic copper transformed basic containers into sculptural accents. Grouping varied sizes on a reclaimed wood shelf created an organic focal point.
Custom vases offer endless styling possibilities. I turned chipped mugs into succulent planters using waterproof sealant. For larger statements, I layered geometric patterns on glass jars with acrylic paint. These projects cost under $10 but deliver high-end visual impact.
| Material | Transformation | Effect |
| Mason jars | Ombré dip-dye | Boho chic |
| Wine bottles | Textured spray paint | Industrial edge |
| Tin cans | Rope wrapping | Coastal vibe |
Balancing natural elements requires intentional layering. I pair smooth river stones with rough-hewn plant stands to create tactile contrast. A coat of whitewash on a wooden ladder display softens its angular lines, allowing ferns and pothos to take center stage.
Beyond beauty, plants became my daily reset button. Tending to a mint plant’s needs or pruning trailing ivy offers mindful pauses. This dual purpose decorative and therapeutic makes greenery the ultimate upgrade for any room’s energy.
Read Also: 10 Modern Dining Room: Transform Your Space in Style
Designer Tips and Tricks from Home Decor Experts
A conversation with design editors revealed how subtle changes create outsized impacts. Good Housekeeping’s Alyssa Gautieri taught me that hooks aren’t just functional they’re styling tools. “Treat hardware like jewelry for your walls,” she advised during our chat. This mindset shift transformed how I approach organization.
Insights from Good Housekeeping and Leading Designers
Strategic hook placement solves multiple problems. I followed Monique Valeris’s tip to install brass hooks at staggered heights near my entryway. They now hold bags, hats, and a hanging plant urning clutter into curated displays. For bathrooms, Gautieri suggests mounting towel hooks beside showers instead of behind doors. This small tweak improved accessibility and airflow.
Colors dictate a room’s rhythm. Valeris’s “60-30-10 rule” became my blueprint: dominant walls in soft sage (60%), cabinetry in warm white (30%), and fixtures in matte black (10%). Testing this in my guest bathroom created cohesion without monotony. She also advocates for trim colors matching walls in small spaces a trick that visually expands square footage.
| Hook Type | Ideal Location | Styling Benefit |
| Brass | Entryways | Adds warm contrast |
| Acrylic | Bathrooms | Resists moisture |
| Wooden | Bedrooms | Softens modern spaces |
Current bathroom trends blend spa-like calm with personality. I adopted Gautieri’s textured tile idea installing hexagonal floor pieces in muted green. Paired with floating shelves and woven baskets, the colors and materials create sanctuary vibes. Valeris’s favorite budget upgrade? Switching outlet covers to match wall colors for seamless integration.
These expert-backed adjustments prove that professional results needn’t require professional budgets. As Valeris reminded me: “Great design happens when intention meets execution—one thoughtful detail at a time.”
Instilling Personality Through Unique DIY Projects
My living room became a canvas when I paired my grandmother’s heirloom clock with sleek acrylic panels a clash of eras that somehow harmonized perfectly. This fusion taught me how personal style emerges through unexpected combinations. Spaces feel authentic when they showcase both history and evolution.
Choosing Colors, Textures, and Patterns
I start every project by testing three elements: mood, contrast, and flow. Earthy terracotta walls gained depth through matte black accent panels in geometric shapes. The pairing created warmth while anchoring the space visually.
Textures bridge bold choices. A nubby wool throw softens industrial metal shelves, while glossy ceramic vases reflect light near rough-hewn wood. These contrasts prevent monotony without overwhelming.
Mixing Vintage Finds with Modern Flair
A 1970s rattan chair found new purpose beneath a minimalist acrylic side table. The duo balances organic curves with clean lines proof that eras can converse beautifully. I often layer aged brass fixtures over smooth concrete panels to achieve this effect.
Successful blends follow a simple rule: let one era dominate. My bedroom’s mid-century bed frame shines against subtle gray walls, while a single Victorian mirror adds intrigue. This hierarchy keeps spaces cohesive yet curious.
Experimentation is key. Try mounting sculptural accent panels behind a vintage dresser or framing thrifted art with sleek metallic borders. These touches transform functional projects into autobiographical statements. After all, rooms should whisper your story before you speak a word.
FAQ
How can I make a small room feel larger without renovation?
I use optical illusions like vertical wooden planks or horizontal stripes on walls to stretch the space visually. Mirrors near natural light sources and layered lighting, such as sconces or floor lamps, also amplify the sense of openness without structural changes.
What’s the easiest way to create an accent wall?
I recommend using removable peel-and-stick panels or sponge paint techniques with acrylics. For texture, try staggered floating shelves in natural wood tones or geometric patterns using painter’s tape and contrasting colors like Benjamin Moore’s “Hale Navy.”
Are live edge shelves beginner-friendly?
Yes! I start with reclaimed materials from local suppliers like Rejuvenation. Sand the edges lightly, apply a food-safe finish like Osmo Polyx-Oil, and mount using heavy-duty brackets. It’s a simple weekend project that adds organic warmth.
How do I prevent hand-painted floors from chipping?
I always use a bonding primer like Kilz Adhesion and high-traffic enamel paint. Finish with three coats of water-based polyurethane, sanding lightly between layers. This method from Good Housekeeping ensures durability even in kitchens.
Can I mix vintage and modern styles without clashing?
Absolutely. I balance mid-century furniture with sleek acrylic vases or metallic accents. Try pairing a rustic ladder clothing rack with minimalist woven baskets. Stick to a cohesive color palette—like Farrow & Ball’s “Slipper Satin” with burnt orange—to unify the look.
What’s a budget-friendly upgrade for outdated cabinets?
I replace hardware with matte black pulls from brands like Liberty and line the interior with removable wallpaper. For a bold twist, paint the cabinet frames in a muted tone and doors in a high-gloss hue like Sherwin-Williams’ “Evergreen Fog.”
How do I incorporate plants without overwhelming a room?
I use wall-mounted propagation stations or hanging glass terrariums. Snake plants in slim cement pots add greenery vertically, while small succulents on live edge shelves keep surfaces clutter-free. Grouping odd numbers (3 or 5) creates intentional displays.
What tools do I need for a sponge-painted feature wall?
You’ll need a base coat paint, sea sponges, and latex glaze. I mix two parts glaze with one part acrylic paint (try Behr’s “Silent Storm”) for translucency. Dab lightly in overlapping circular motions, blending edges as you go. Seal with a clear topcoat.
How can lighting transform a bland corner?
I layer a plug-in swing-arm sconce (like Urban Outfitters’ “Casa” line) with a plug-in pendant light. Angle them toward textured walls or artwork to cast dynamic shadows. Smart bulbs from Philips Hue let you adjust warmth for evening ambiance.
What’s the secret to cohesive gallery walls?
I stick to one color frame style but vary sizes. Use command strips to arrange layouts on the floor first. Incorporate 3D elements like woven trays or mini floating shelves between frames. Odd numbers (5, 7, 9) create rhythm without chaos.
Conclusion
Transforming spaces becomes effortless when creativity leads the way. Throughout this guide, we’ve explored how paint techniques revive tired surfaces and how reclaimed materials spark character. From geometric accent walls to modular storage, each project balances practicality with personal expression.
Simple tools and accessible methods make upgrades achievable for all skill levels. A thrifted mirror gains new life with metallic finishes. Wooden crates evolve into rustic shelves. These approaches prove that style thrives through intention, not expense.
Every idea here serves a dual purpose: solving functional needs while reflecting individual taste. Whether testing sponge textures or arranging floating displays, the goal remains constant—spaces should feel authentically yours.
I encourage you to experiment with these concepts. Share your unique twists online, and remember: perfection matters less than progress. A single brushstroke or salvaged plank can ignite a room’s transformation. Your journey begins where vision meets action.